はじめに
Laravel で View 用のロジックを分離できるライブラリ robclancy/presenter の使い方について整理した。
TL;DR
- robclancy/presenter を使うと簡単に Decorator パターンを実装できる
composer require robclancy/presenter でインストール- ちょっとした設定、XxxxPresenter クラスの作成、Model ファイルの編集だけで View 用のロジックを分離できて便利
目次
- はじめに
- TL;DR
- 環境・条件
- 詳細
- robclancy/presenter について
- 使い方
- ベースプロジェクト作成
- robclancy/presenter のセットアップ
- まとめ
- その他・メモ
- 参考文献
環境・条件
1
2
3
4
5
6
7
8
9
10
11
12
13
14
15
16
| $ sw_vers
ProductName: Mac OS X
ProductVersion: 10.14.6
BuildVersion: 18G95
$ php -v
PHP 7.1.23 (cli) (built: Feb 22 2019 22:19:32) ( NTS )
Copyright (c) 1997-2018 The PHP Group
Zend Engine v3.1.0, Copyright (c) 1998-2018 Zend Technologies
$ composer -V
Composer version 1.9.0 2019-08-02 20:55:32
$ composer show robclancy/presenter
name : robclancy/presenter
versions : * 1.4.0
|
詳細
View に関するロジックを専用のクラスに切り出すことのできる PHP のライブラリ。いわゆる Decorator パターンを実現できる。
使い方
Laravel での使用方法は Laravle Usage にまとまっている。
が、(自分のような) Laravel 初心者だと色々と迷うこともあるので、簡単に使い方を整理しておく。
リポジトリ: 17number/php-laravel-with-robclancy-presenter
ベースプロジェクト作成
既にプロジェクトがある場合はスキップ。
composer で新規プロジェクトを作成。
1
2
| $ composer create-project --prefer-dist laravel/laravel myapp
$ cd myapp
|
手っ取り早く sqlite を使うので .env を編集。
1
2
3
4
5
6
7
8
9
10
| -APP_NAME=Laravel
+APP_NAME=myapp
...
-DB_CONNECTION=mysql
+DB_CONNECTION=sqlite
-DB_HOST=127.0.0.1
-DB_PORT=3306
-DB_DATABASE=laravel
-DB_USERNAME=root
-DB_PASSWORD=
|
config/database.php を編集。
1
2
| - 'default' => env('DB_CONNECTION', 'mysql'),
+ 'default' => env('DB_CONNECTION', 'sqlite'),
|
database/database.sqlite を新規作成。
1
| $ touch database/database.sqlite
|
元々あった User モデルに関するファイルを削除。
1
2
3
| $ rm app/User.php
$ rm database/migrations/2014_10_12_000000_create_users_table.php
$ rm database/migrations/2014_10_12_100000_create_password_resets_table.php
|
新規に User モデルを作成。
1
| $ php artisan make:model User --migration
|
app/User.php を編集。
1
2
3
4
5
6
7
8
9
10
11
12
| <?php
namespace App;
use Illuminate\Database\Eloquent\Model;
class User extends Model
{
protected $fillable = [
'name',
];
}
|
database/migrations/yyyy_mm_dd_hhmmss_create_users_table.php を編集。id と name だけのシンプルな構成とする。
1
2
3
4
5
6
7
8
9
10
11
12
13
14
15
16
17
18
19
20
21
22
23
24
25
26
27
28
29
30
31
32
| <?php
use Illuminate\Support\Facades\Schema;
use Illuminate\Database\Schema\Blueprint;
use Illuminate\Database\Migrations\Migration;
class CreateUsersTable extends Migration
{
public function up()
{
Schema::create('users', function (Blueprint $table) {
$table->bigIncrements('id');
$table->string('name');
$table->timestamps();
});
}
public function down()
{
Schema::dropIfExists('users');
}
}
|
マイグレーション実行。
routes/web.php を編集してルーティングを追加。
1
2
3
4
5
| Route::get('/', function () {
return view('welcome');
});
+
+Route::get('users', 'UsersController@index');
|
Controller を作成。
1
| $ php artisan make:controller UsersController
|
app/Http/Controllers/UsersController.php を編集。
1
2
3
4
5
6
7
8
9
10
11
12
13
14
| <?php
namespace App\Http\Controllers;
use Illuminate\Http\Request;
use App\User;
class UsersController extends Controller
{
public function index() {
$users = User::all();
return view('users.index', ['users' => $users]);
}
}
|
View を作成。
1
2
| $ mkdir -p resources/views/users/
$ touch resources/views/users/index.blade.php
|
resources/views/users/index.blade.php を編集。ID と名前を一緒に一覧表示するだけの内容。
1
2
3
4
5
6
7
8
9
10
11
12
13
14
15
16
17
18
| <!DOCTYPE html>
<html lang="ja">
<head>
<meta charset="UTF-8">
<meta name="viewport" content="width=device-width, initial-scale=1.0">
<meta http-equiv="X-UA-Compatible" content="ie=edge">
<title>Document</title>
</head>
<body>
<ul>
@forelse ($users as $user)
<li><?php echo $user->id . ": " . $user->name; ?></li>
@empty
<li>empty</li>
@endforelse
</ul>
</body>
</html>
|
テスト用のデータを生成するために、database/seeds/UsersTableSeeder.php を作成。
1
2
3
4
5
6
7
8
9
10
11
12
13
14
15
16
17
18
19
20
21
22
| <?php
use App\User;
use Illuminate\Database\Seeder;
class UsersTableSeeder extends Seeder
{
public function run()
{
for ($i=0; $i<5; $i++) {
$userName = "user_$i";
if (!User::where('name', $userName)->first()) {
User::create(['name' => $userName]);
}
}
}
}
|
database/seeds/DatabaseSeeder.php を編集。
1
2
3
4
5
6
7
| public function run()
{
- // $this->call(UsersTableSeeder::class);
+ $this->call([
+ UsersTableSeeder::class,
+ ]);
}
|
データ投入。
1
2
| $ composer dump-autoload
$ php artisan db:seed
|
動作確認するために、サーバ起動。
1
| $ php artisan serve --host 127.0.0.1 --port 9999
|
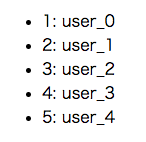
http://127.0.0.1:9999/users にアクセスして、以下のような画面が表示されれば OK。
Compoesr でインストール。
1
| $ composer require robclancy/presenter
|
config/app.php を編集。
1
2
3
4
5
6
7
8
9
10
11
12
13
14
15
16
17
18
19
20
| 'providers' => [
/*
* Laravel Framework Service Providers...
*/
Illuminate\Auth\AuthServiceProvider::class,
...
Illuminate\View\ViewServiceProvider::class,
/*
* Package Service Providers...
*/
+ Robbo\Presenter\PresenterServiceProvider::class,
/*
* Application Service Providers...
*/
App\Providers\AppServiceProvider::class,
...
],
|
app/Presenters ディレクトリを作成し、XxxxPresenter.php(今回は UserPresenter.php)を作成。
1
2
| $ mkdir app/Presenters
$ touch app/Presenters/UserPresenter.php
|
app/Presenters/UserPresenter.php を編集。View 用のメソッドを追加する。
1
2
3
4
5
6
7
8
9
10
11
12
| <?php
namespace App\Presenters;
use Robbo\Presenter\Presenter;
class UserPresenter extends Presenter
{
public function idWithName(){
return $this->id . ': ' . $this->name;
}
}
|
app/User.php を編集。Robbo\Presenter\PresentableInterface を実装すれば OK。
1
2
3
4
5
6
7
8
9
10
11
12
13
14
15
16
17
18
19
20
21
22
23
24
25
| <?php
namespace App;
use Illuminate\Database\Eloquent\Model;
+use App\Presenters\UserPresenter;
+use Robbo\Presenter\PresentableInterface;
-class User extends Model
+class User extends Model implements PresentableInterface
{
protected $fillable = [
'name',
];
+
+ /**
+ * Return a created presenter.
+ *
+ * @return Robbo\Presenter\Presenter
+ */
+ public function getPresenter()
+ {
+ return new UserPresenter($this);
+ }
}
|
View ファイル(resources/views/users/index.blade.php)を編集。app/Presenters/UserPresenter.php で定義したメソッドがそのまま呼び出せる。
1
2
3
4
5
6
7
8
| <ul>
@forelse ($users as $user)
- <li><?php echo $user->id . ": " . $user->name; ?></li>
+ <li><?php echo $user->idWithName(); ?></li>
@empty
<li>empty</li>
@endforelse
</ul>
|
http://127.0.0.1:9999/users にアクセスして、さきほどと同じ画面が表示されれば OK。
まとめ
- robclancy/presenter を使うと簡単に Decorator パターンを実装できる
composer require robclancy/presenter でインストール- ちょっとした設定、XxxxPresenter クラスの作成、Model ファイルの編集だけで View 用のロジックを分離できて便利
その他・メモ
中間テーブルを使うケースについても検討中。
参考文献
関連記事