Hexo でブログを作成して Netlify で公開するまで
はじめに
Hexo + GitHub + Netlify でブログを作って公開するまでの手順をまとめる。
手探りで進めたので、設定できてるけどそうじゃない、みたいな項目が結構あるかもしれない。
2019/09/29 16:40 時点で執筆途中、随時追記中
TL;DR
- 基本的に公式手順通りに進めれば OK
- 手順整理したから参考にしてね
- Hexo(SSG) + GitHub + Netlify はいいぞ
目的・やったこと
Hexo + GitHub + Netlify でこのブログを作ったので、その手順をまとめておく。
ブログテーマは Tranquilpeak を使用。ちょっと細かい箇所をいくつかカスタマイズしてある。
ドメインは Google Domains で取得。某お◯前ドットコム みたいに無駄なメールが来ないので良い。
目次
- はじめに
- TL;DR
- 目的・やったこと
- 環境・条件
- 前提知識
- 詳細
- その他・メモ
- 参考文献
環境・条件
ブログ環境 を参照
前提知識
Hexo
静的サイトジェネレータ(SSG: Static Site Generator)。HTML + CSS + JavaScript(JS) だけで構成されるウェブサイトを簡単に作れるツール。
Hexo は Node.js 製。他にも React を使っている Gatsby や、Golang 製の Hugo などがある。
StaticGen で一覧見れる。
GitHub
言わずとしれた Git ホスティングサービス。今回はブログ本体を格納するのに使う。
Netlify
静的サイトのホスティングサービス、超速い(らしい)。今回はブログを公開するのに使う。
詳細
Hexo インストール
Node.js, Git は導入してある前提で進める。なお、公式手順はこちら。
npm で hexo-cli をインストールしておしまい。
1 | npm install -g hexo-cli |
ブログ作成(ローカル)
ひな形作成
まずはブログひな形を作る、以下の3コマンドでおしまい
1 | hexo init YourBlogName |
npm install が終わったらいったん commit しておくのをオススメする。
1 | git add -A |
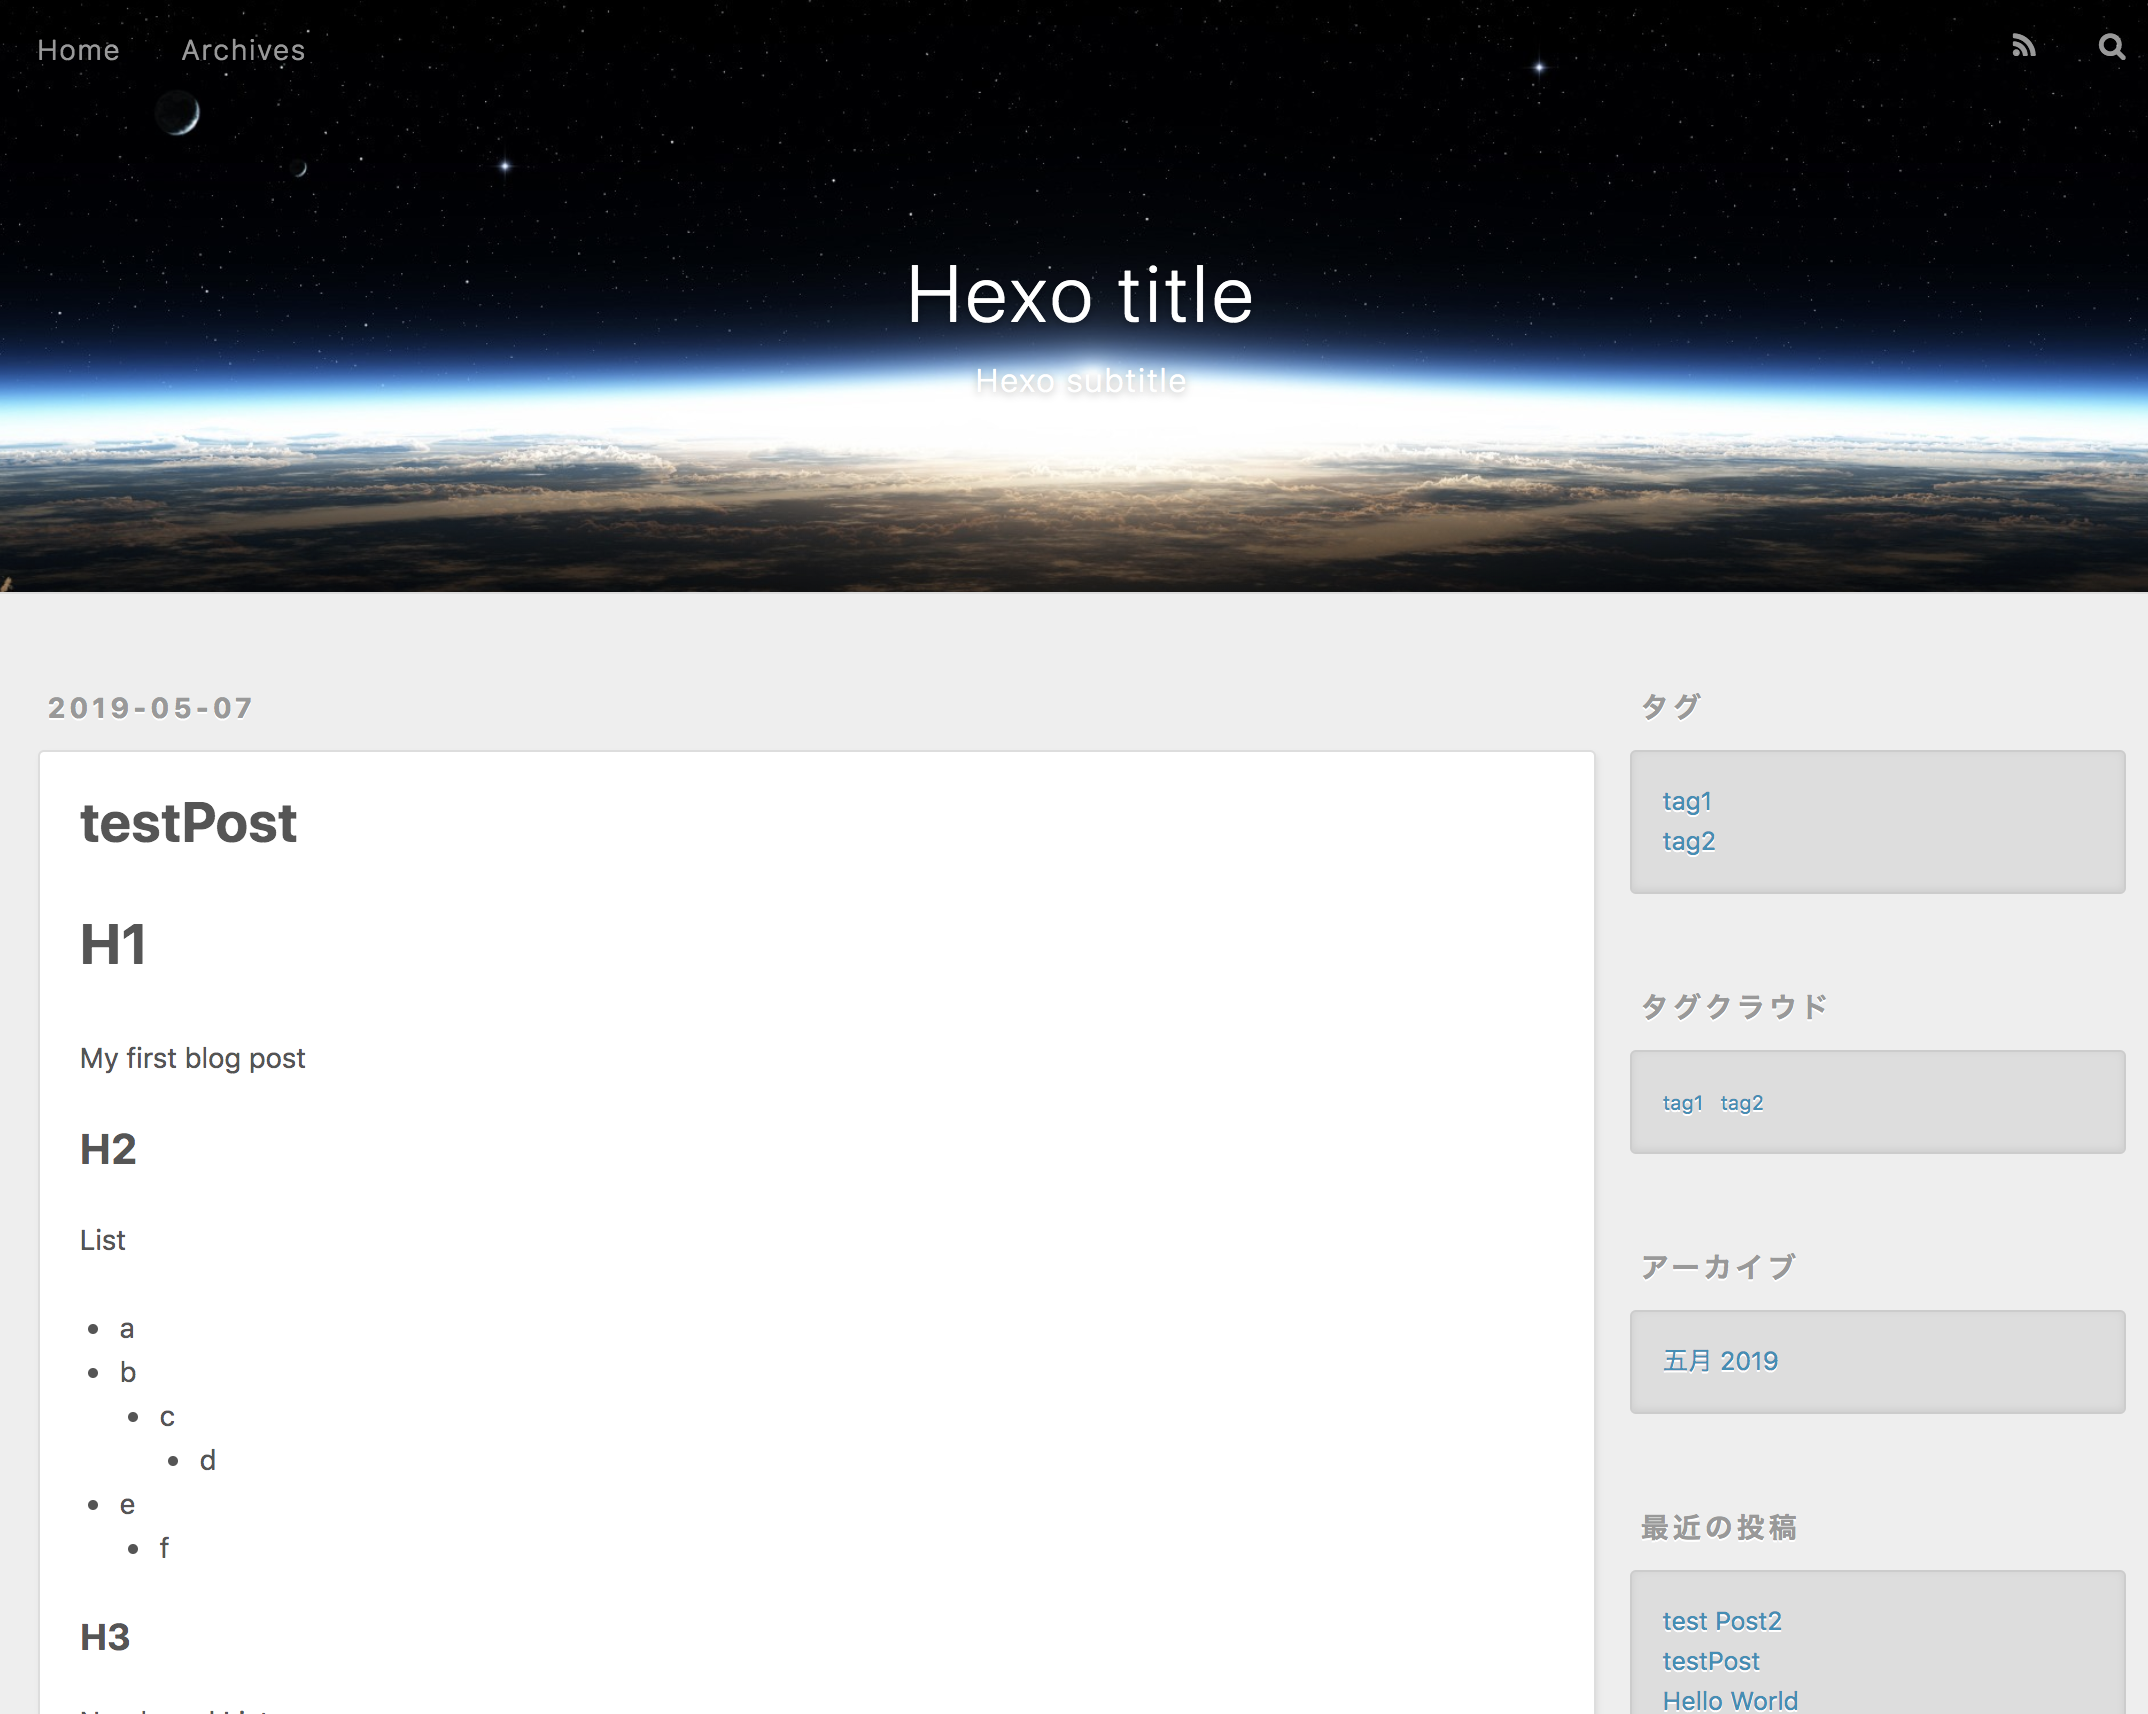
hexo s でローカルサーバを立ち上げて、http://localhost:4000 にアクセスするとブログができてるはず。
ブログ設定
ブログタイトルなどの設定を変更する。
詳細は Configuration | Hexo を参照。
タイトル・サブタイトル
YourBlogName/_config.yml の title, subtitle を変更。
1 | title: to-me-mo-rrow |
言語・タイムゾーン 設定
YourBlogName/_config.yml の language, timezone を変更。
1 | language: ja |
その他
YourBlogName/_config.yml の description, keywords, author などを変更。
テーマ変更
デフォルトテーマは何かアレなので、色々と探して tranquilpeak に変更することにした。
私は tranquilpeak を使うことにしたが、他のテーマを使いたい人は Themes に色々とあるので探すと良い。HexoでBlogを書くためのオススメtheme(テーマ)一覧|おちゃカメラ。 も参考になると思う。
公式リポジトリ から zip ファイルをダウンロードして展開。
ブラウザで DL した人は適宜ファイル名などを読み替えてほしい。自分の環境ではなぜか unzip が失敗したので GUI から展開した。
1 | curl https://github.com/LouisBarranqueiro/hexo-theme-tranquilpeak/archive/master.zip --create-dirs -o themes/tranquilpeak.zip |
展開したら zip ファイルは不要なので削除し、展開後のディレクトリをリネーム。
1 | rm tranquilpeak.zip |
リネームしたら YourBlogName/themes 配下に tranquilpeak がある構成になっているはず。
themes/tranquilpeak に移動して、インストール&ビルド。
1 | cd tranquilpeak |
あとは YourBlogName/_config.yml に theme という項目があるので、それを変更する。
1 | -theme: landscape |
(ローカルサーバが起動している場合には Ctrl + C で停止してから、)hexo s でローカルサーバを起動して http://localhost:4000 にアクセスするとテーマが変わっているはず。起動できない場合はカレントディレクトリが間違ってる可能性がある、YourBlogName で hexo s を実行すること。
確認できたら例によって commit しておこう。(コマンド省略)
tranquilpeak カスタマイズ
テーマは変わったが、まだやることがあるので 公式手順 通りに進める。
その他、見た目に関する部分などを少しいじる。
post_asset_folder
YourBlogName/_config.yml の post_asset_folder を true に。
1 | -post_asset_folder: false |
RSS Feed 導入
hexo-generator-feed プラグインをインストール。これも YourBlogName ディレクトリで実行すること、YourBlogName/themes/tranquilpeak の実行でないことに注意。
1 | npm install hexo-generator-feed --save |
YourBlogName/_config.yml に以下を追加。limit は適宜変更。
1 | feed: |
その他、細かい設定は hexojs/hexo-generator-feed: Feed generator for Hexo. を参照。
sitemap 導入
hexo-generator-sitemap プラグインをインストール。これも YourBlogName ディレクトリで実行すること。
1 | $ npm install hexo-generator-sitemap --save |
YourBlogName/_config.yml に以下を追加。
1 | sitemap: |
追加後、hexo g して http://localhost:4000/sitemap.xml にアクセスして確認。
1 | $ hexo clean && hexo g |
※hexo-generator-seo-friendly-sitemap もあるので、お好みで設定すると良さそう。
Algolia による検索有効化
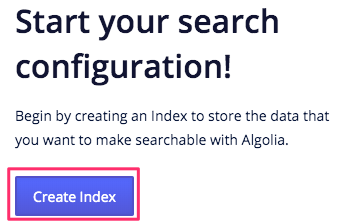
Algolia でアカウントを作成。作成後、Endpoint をどこにするかとか色々と聞かれるので、適当に設定。
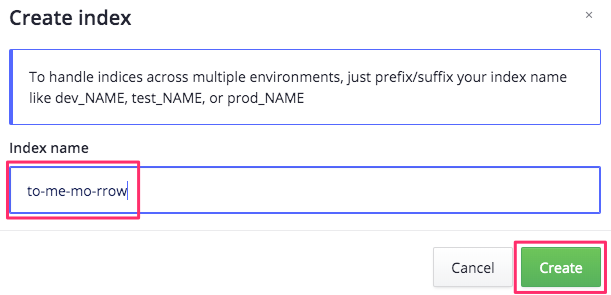
Dashboard に移動し、Index 名を適当に設定する。後で使うので覚えておく。
hexo-algoliasearch プラグインをインストール。これも YourBlogName ディレクトリで実行。
1 | $ npm install hexo-algoliasearch --save |
YourBlogName/_config.yml に algolia の設定を追加。
1 | algolia: |
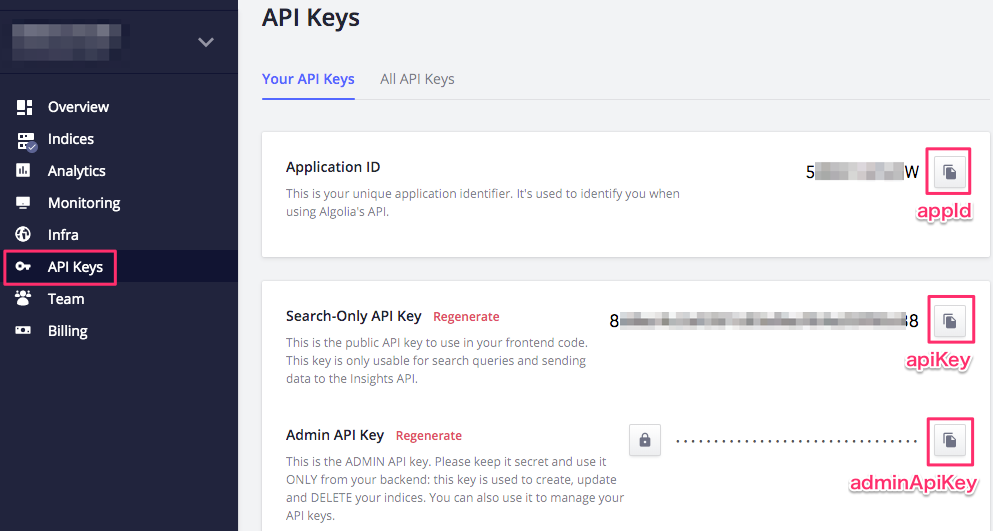
appId, apiKey, adminApiKey は Dashboard 左側の「API Keys」ページにアクセスしたら表示される。
hexo algolia を実行するとインデックスが作成できるが、ローカルで実行すると Git 上にアップロードしていない記事についてもインデックス作成されてしまうので、後ほど Netlify でビルド成功後に実行するようにする。
固定ページ 作成
hexo new page コマンドで固定ページ作成。ちなみに hexo new もしくは hexo new post で記事作成、hexo new draft で下書き作成ができる。
1 | hexo new page all-categories |
source/all-categories/index.md ができるので、以下に変更して保存。
1 | --- |
同じように hexo new page all-tags, hexo new page all-archives で作って、書き換えて保存する。
1 | hexo new page all-tags |
source/all-tags/index.md
1 | --- |
source/all-archives/index.md
1 | --- |
Google Analytics 設定
YourBlogName/themes/tranquilpeak/_config.yml に設定箇所があるので、自分の ID を設定
1 | google_analytics_id: UA-12345678-9 |
公式手順 を見て、Google Analytics で localhost を除外するように設定。
404 ページ 作成
YourBlogName/source/404.md を作成。
1 | --- |
画像は安定のいらすとやで DL して、YourBlogName/source/assets/images/404.png に配置した。
記事ページでもサイドバーを常に表示
デフォルトだと、記事ページではサイドバーが表示されない設定になっているが、常にサイドバーを出すように変更する。
themes/tranquilpeak/_config.yml の clear_reading を false に設定する。
1 | -clear_reading: true |
ファビコン 設定
デフォルトだと地球みたいなファビコンなので変更する。
元画像は Canva で 128x128 で作成、とりあえず大きめで作っておけば良いと思う。

この画像を使って、ファビコン作成 で favicon.ico に変換。
変換したファイルを以下に配置。
themes/tranquilpeak/source/_images/favicon.icothemes/tranquilpeak/source/assets/images/favicon.ico
配置したら themes/tranquilpeak/_config.yml の favicon を変更。
シェアボタン
デフォルトで SNS へのシェアボタンがあるが、(一般ユーザー向け)Google+ はサービス終了したので非表示にする。
ついでに、適切なフォントは無いけどはてなブックマークへのシェアボタンを適当に追加する。
themes/tranquilpeak/_config.yml を編集。
1 | @@ -275,9 +275,9 @@ sharing_options: |
このままだとマウスホバー時のメッセージなどが出てこないので、 themes/tranquilpeak/languages/ja.yml を編集。
1 | @@ -19,6 +19,7 @@ global: |
スマホなどでシェアボタンを表示したときのマージンを調整する。
themes/tranquilpeak/source/_css/components/_share-options-bar.scss を編集、.share-option-btn の中に Font Awesome 向けの margin-right があるので fas も対象に追加する。
1 |
|
変更後は themes/tranquilpeak で npm run prod。
1 | cd themes/tranquilpeak && npm run prod && cd - # 面倒くさいのでワンライナーで |
サイドバーの表示項目 変更
デフォルトだと Stack Overflow など全部盛りで表示されているが、不要なリンクは非表示にしたい。
themes/tranquilpeak/_config.yml を変更する。
- 表示したい項目へのリンク(ユーザー名など)を追加
- 非表示にしたい項目のコメントアウト
1 | author_links: |
サイドバーの背景画像 変更
以下の手順で変更できる
YourBlogName/source/assets/images/に好きなファイルを設置YourBlogName/themes/tranquilpeak/_config.ymlのcover_imageを書き換え
サイドバーの CSS 変更
サイドバーの文字が読みづらいので、text-shadow で文字を縁取りしつつ、文字の太さを変更。設定箇所が2箇所あるので注意。
- 編集ファイル:
themes/tranquilpeak/source/_css/utils/mixins/_sidebar.scss
- 編集箇所:
.sidebar-button-desc
1 | // Description (name) of a link |
変更後は themes/tranquilpeak で npm run prod。
1 | cd themes/tranquilpeak && npm run prod && cd - # 面倒くさいのでワンライナーで |
サイドバーにブログタイトル、サブタイトル追加
サイドバーにブログタイトルと、サブタイトルを表示するように変更。

まずは themes/tranquilpeak/layout/_partial/sidebar.ejs を編集。
1 | <nav id="sidebar" data-behavior="<%= sidebarBehavior %>"> |
表示箇所を追加したら themes/tranquilpeak/source/_css/utils/mixins/_sidebar.scss でスタイルを調整。
1 |
|
変更後は themes/tranquilpeak で npm run prod。
1 | cd themes/tranquilpeak && npm run prod && cd - # 面倒くさいのでワンライナーで |
<title> にサブタイトルを追加
タイトルバー等に表示される <title> に、サブタイトルを追加。
themes/tranquilpeak/layout/_partial/head.ejs を編集。
1 | <meta charset="UTF-8"> |
変更後は themes/tranquilpeak で npm run prod。
1 | cd themes/tranquilpeak && npm run prod && cd - # 面倒くさいのでワンライナーで |
カスタムフォントの導入
Tranquilpeak Hexo theme demo や 日本語テスト - Tranquilpeak Hexo theme demo と比較するとわかるが、デフォルトのものからフォントを変更した。
使用したフォントは下記。
- Google Fonts+ の M PLUS Rounded 1c
- 合字表示フォントの tonsky/FiraCode
今回はフォントのビルドなどはせず、CDN で配信されているものをそのまま読み込む。
themes/tranquilpeak/layout/_partial/head.ejs を編集し、適当な位置に以下を追加。
1 | <link href="https://fonts.googleapis.com/css?family=M+PLUS+Rounded+1c" rel="stylesheet"> |
themes/tranquilpeak/source/_css/utils/_variables.scss を編集し、フォント利用箇所を設定。細かいことを考えるのが面倒だったので、全て統一することにした。
1 | --- a/themes/tranquilpeak/source/_css/utils/_variables.scss |
Fira code の合字(リガチャー)を有効化するために、以下の設定を code 部に追加する。編集したファイルは下記。
themes/tranquilpeak/source/_css/base/_base.scssthemes/tranquilpeak/source/_css/components/_code.scss
1 | font-feature-settings: "calt" 1; /* Enable ligatures for IE 10+, Edge */ |
変更後は themes/tranquilpeak で npm run prod。
1 | cd themes/tranquilpeak && npm run prod && cd - # 面倒くさいのでワンライナーで |
記事の投稿日時の表示フォーマット変更
投稿日時が 2019/07/30 のように YYYY/MM/DD までだったので、2019/07/30 12:30 のように YYYY/MM/DD HH:mm までに変更。
themes/tranquilpeak/languages/ja.yml の data_format を変更すれば OK。
1 | -date_format: "YYYY/MM/DD" |
記事の更新日時を追加
雑に投稿して、雑に更新していくつもりなので、更新日時も合わせて表示した。
themes/tranquilpeak/layout/_partial/post/meta.ejs を変更。記事の Front-matter に updated がある場合のみ更新日時を表示。ついでに改行コードも追加
1 | <time datetime="<%= post.date.format() %>"> |
投稿日時、更新日時、カテゴリの前にアイコンフォント追加
投稿日時と更新日時が並んで何の時間か分からないので、アイコンフォント(Font Awesome)を追加した。統一感をもたせるために、カテゴリ部分にも追加。
それぞれ使ったアイコンは下記。
- 投稿日時: file-alt | Font Awesome
- 更新日時: redo-alt | Font Awesome
- カテゴリ: folder-open | Font Awesome
変更するファイルは themes/tranquilpeak/layout/_partial/post/meta.ejs
1 | + <i class="fas fa-file-alt"></i> |
アイコンフォントの横幅が異なるので CSS(SCSS) で調整、変更ファイルは下記の3つ。
themes/tranquilpeak/source/_css/components/_post-header-cover.scss.port-meta内
themes/tranquilpeak/source/_css/components/_post.scss.port-meta内
themes/tranquilpeak/source/_css/components/_postShorten.scss.portShorten-meta内
1 | + i.fas { |
その他 カスタマイズ
記事フォーマットの 追加/編集
「はじめに」やら「環境」やら、同じようなことを記事作成ごとに書くのはダルいのでフォーマットそのものを変更。post, page, draft の3種類が使えるが、どうせなので技術記事向けには別のフォーマット tech を作ることにした。
まずは単純にコピー。
1 | $ cp scaffolds/{post,tech}.md |
以下の内容に変更、なお実際は改行がもっと入っている。Front-matter(先頭の title とかの部分) については公式ドキュメントを参照。
1 | --- |
これで今後は hexo new tech xxxx とやると、このフォーマットの記事ファイルが作成される。
Disqus の追加
TODO: そのうちやる、Hexo に コメント欄 の Disqus を 設置 | 験なきものを思はずは
ブログ公開(Netlify)
ブログのカスタマイズなどがひととおりできたら、GitHub と Netlify を使って公開する。
リポジトリ作成
今回は GitHub のプライベートリポジトリを使った。Netlify は Bitbucket や GitLab でも連携できるので、好きなサービスを使うとよい。
Create a New Repository で、適当に名前をつけてリポジトリを作成する。私は Private にしたけど「別に公開しても困らない」なら Public でも良いと思う。
ソースコード登録
リポジトリを作成したらソースコードをプッシュする。
1 | $ git remote add origin git@github.com:<yourName>/<yourRepo>.git |
なお、もしも YourBlogName/themes/tranquilpeak/.gitignore が存在している場合には、削除してからプッシュすること。このファイルがあると、公開したブログにテーマが適用されないことがある。
- Netlify deployment · Issue #488 · LouisBarranqueiro/hexo-theme-tranquilpeak
- Netlify Not Generating Assets Folder · Issue #475 · LouisBarranqueiro/hexo-theme-tranquilpeak
1 | $ rm themes/tranquilpeak/.gitignore |
Netlify と GitHub を連携する
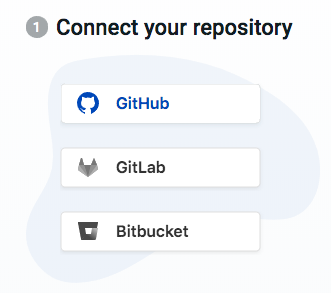
Netlify のアカウントを作成したら、New site from Git を押してサイトを作成していく。
はじめにどの Git サービスを使うか聞かれるので、自分のリポジトリがあるサービスを選ぶ。
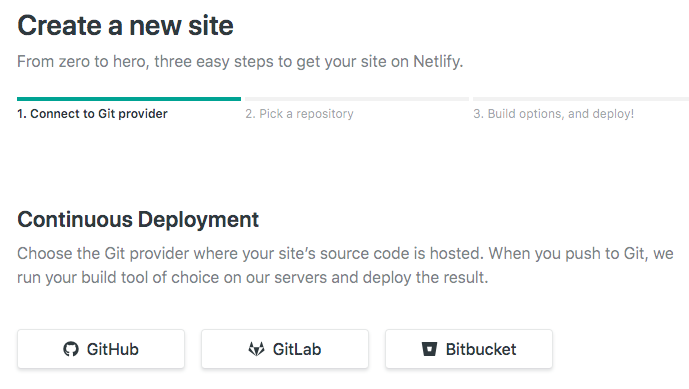
選んだら「Netlify と連携してもいいか」みたいなことを聞かれたと思うので、適当に同意して進めていく。
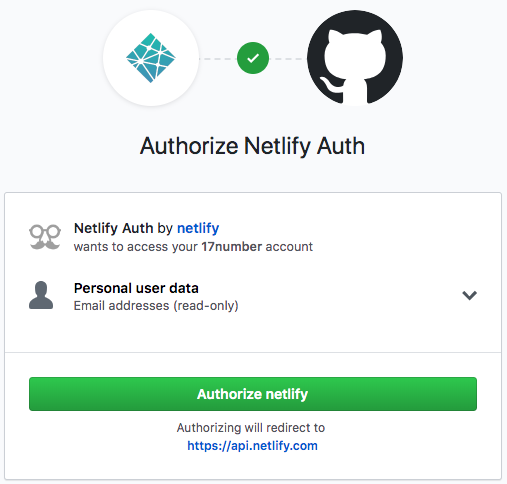
リポジトリ選択画面まできたら、連携したいリポジトリを選択する。が、Private だと出てこないので、一度 Git サービス側のページに移動して設定を行う必要がある。基本的に手順通りに進めれば問題ないはず。

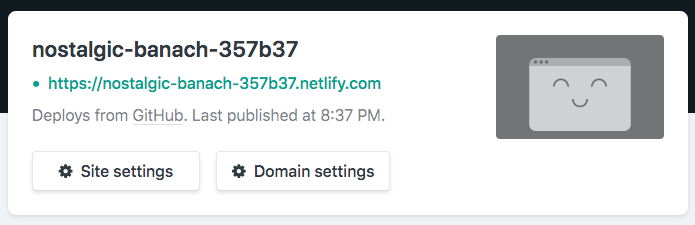
リポジトリを選んだら、デプロイ(ブログ公開)するブランチなどを選択して Deploy Site を押せば完了。事前にソースコードをプッシュしていれば、Build command などは自動で入っているはず。
これでしばらく待てばブログが公開される、めちゃくちゃ簡単である。
Algolia の設定
サイトデプロイ時に hexo algolia を実行してインデックスを生成するようにする。
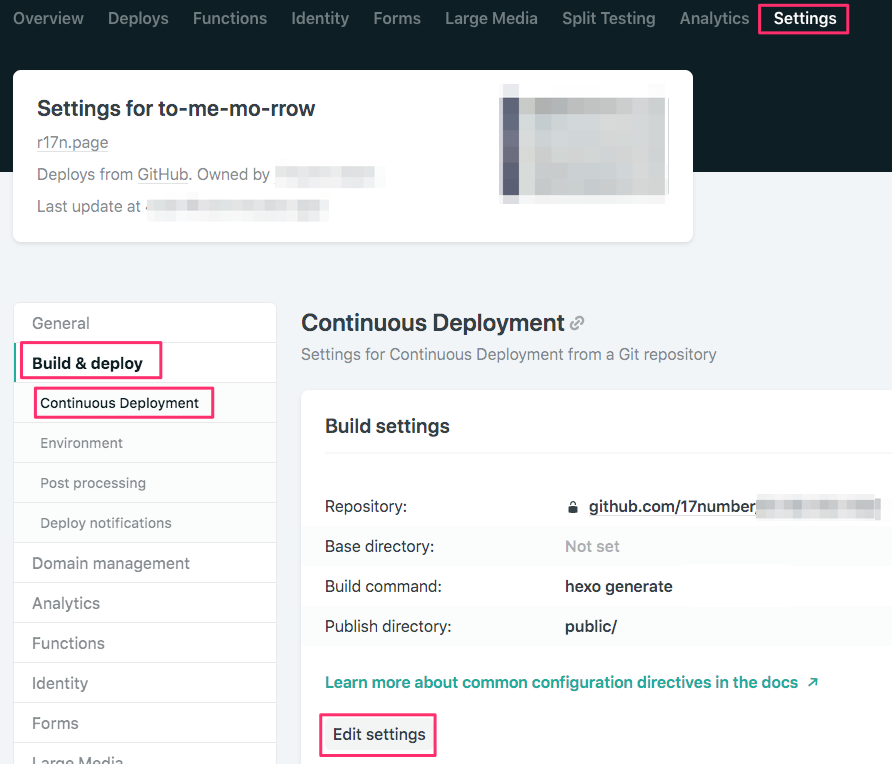
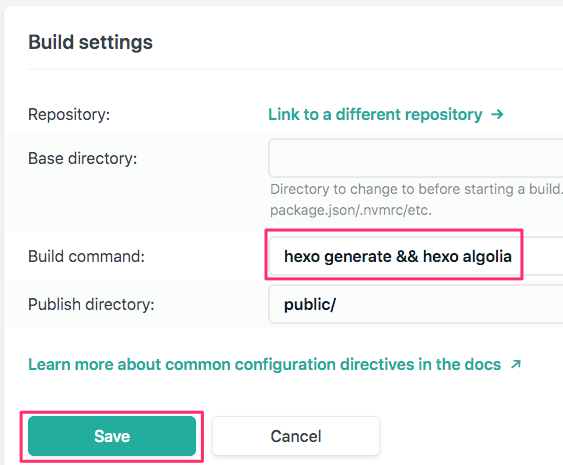
hexo generate を hexo generate && hexo algolia に変更。
Deploys から最新のリポジトリから手動デプロイが可能なので、必要に応じて試してみると良い。
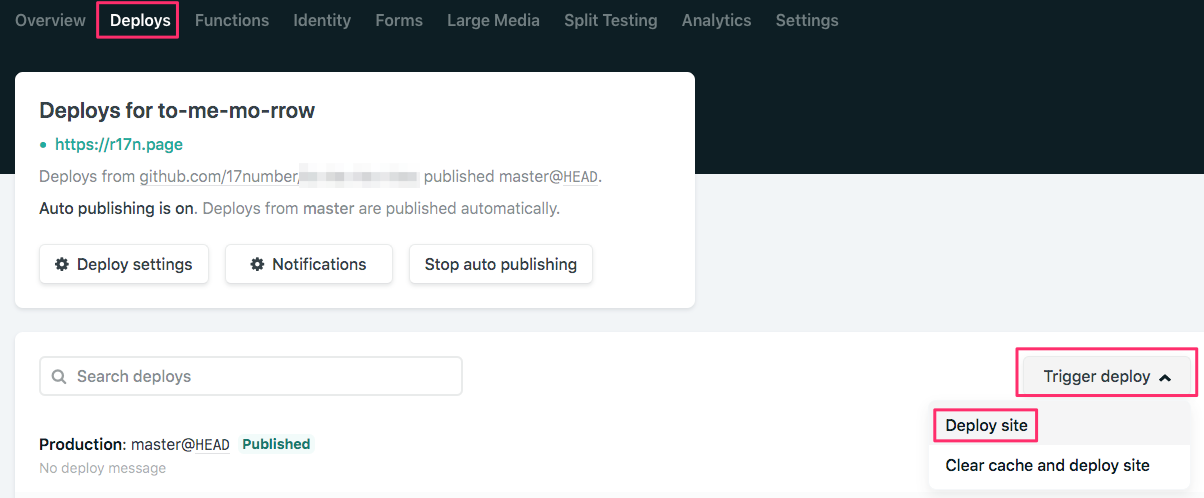
インデックスの生成に成功すると、Indices で確認できるようになる。
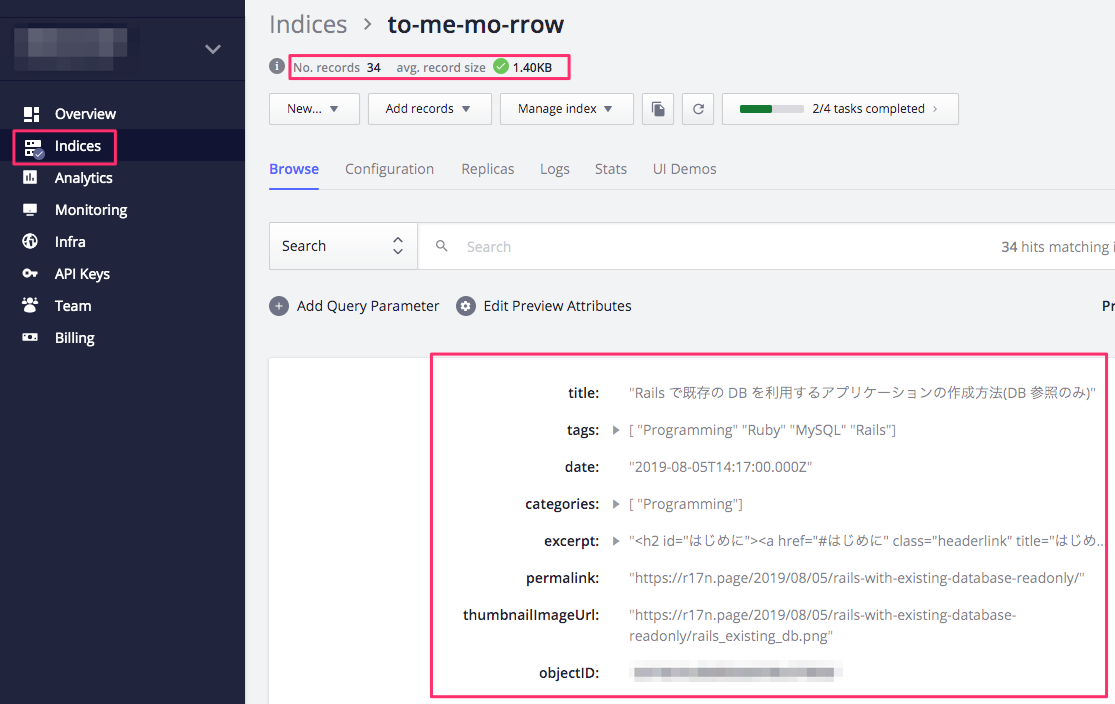
TODO: あとで書く
サイト名 変更
Search Console
タイムゾーン
Deploy Notification
その他・メモ
参考文献
SSG として Hexo 以外の利用も視野に入れていた(何を使うかを決めかねていた)ので、その際に調べたものもまとめて記載。順不同。
- 静的サイトジェネレータの世界 (1) : 概要 - YoshinoriN’s Memento
- 静的サイトジェネレータの世界 (2) : 種類と解説 - YoshinoriN’s Memento
- 静的サイトジェネレータの世界 (3) : 公開方法について - YoshinoriN’s Memento
- 静的サイトジェネレータの世界 (4) : Hexoを使ってみよう!! - YoshinoriN’s Memento
- 静的サイトジェネレータの世界 (5) : Vue.jsのサイト事例 - YoshinoriN’s Memento
- 静的サイトジェネレーターHugoの良いとこ悪いとこ | MF KESSAI TECH BLOG
- Hexoでローカルに静的なブログを作ってみて基本構成を把握する | Qookie Tech
- WordPressからHexoにブログ移行して分かったメリット・デメリット|おちゃカメラ。
- ブログはWordpressは辞めて、全て静的サイトジェネレーターに移行したい - Qiita
- HexoとNetlifyで快適なブログ環境を手に入れよう! - Adwaysエンジニアブログ
- HexoでBlogを書くためのオススメtheme(テーマ)一覧|おちゃカメラ。
- Hexo コマンド|Akanetrip
- Hexo 設定ファイル|Akanetrip
- vscode-hexo - Visual Studio Marketplace
- History - YoshinoriN’s Memento
- 【Hugo】Tranquilpeakテーマのユーザマニュアル翻訳
- [Hexo] 「*.log」ブログカスタマイズ日記 - *.log -どっとログ-
- [Hexo][Tranquilpeak] ファビコン(favicon)導入 - *.log -どっとログ-
- ブログをGitHub PagesからNetlifyへ移行した話 - Qiita
- 【GithubPages VS Netlify VS Firebase】爆速で静的サイトのホスティングができるのはどれ? | カオスボーイ・トーキョー
- Nuxt.js + Netlifyで爆速構築するサーバーレス開発入門 - Qiita
- NetlifyはGitHubなどからデプロイできる静的Webホスティングサービス | Qookie Tech
- Netlify移行記:GitHub Pagesから独自ドメイン+Netlifyの引っ越しでやったこと|おちゃカメラ。
- netlifyに感動したので、netlify-cli使ってみた - Qiita
- Hexo の フィード と サイトマップ を 設定 | 験なきものを思はずは
- Hexo で PubSubHubbub 通知をする | 験なきものを思はずは
- ブログの環境がやっと整った... - YoshinoriN’s Memento
- ぼくのかんがえたさいきょうの配色Webサービスを公開するよりも Hexo でブログ公開する方が大変だった話 - Qiita