Node.js の画像変換モジュール sharp の使い方(リサイズ)
はじめに
Node.js の画像変換モジュール sharp を使ったリサイズ方法について調べた。
TL;DR
npm install sharpのみで使える- ImageMagick より 4〜5倍ほど高速(らしい)
sharp("path").resize(width, height).toFile("path")でリサイズして出力と簡単
目次
環境・条件
1 | $ sw_vers |
詳細
sharp とは
Node.js で使用可能な画像変換モジュール。
特徴
- JPEG, PNG, WebP, TIFF, DZI などに対応
- リサイズ、回転、ガンマ補正などの操作が可能
npm install sharpのみ行えば OK(追加インストールなどは不要)- ImageMagick, GraphicsMagic より 4〜5 倍高速(らしい)
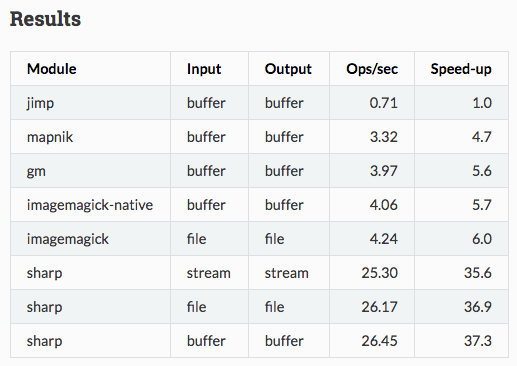
Performance - sharp より引用
セットアップ
npm install のみ。
1 | $ npm install sharp |
使い方
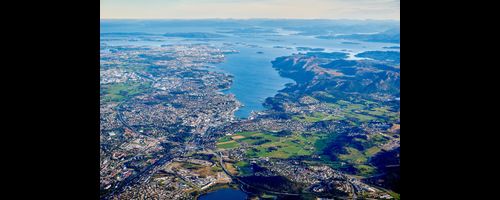
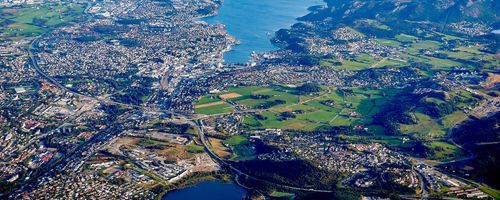
画像変換を行うにあたって、インプットは Pixabayのこの写真 を 1920x1080 でダウンロードして、aerial_1920.jpg として保存した。

基本形
require でロードして使う。
1 | const sharp = require("sharp"); |
コールバック、Promise、async/await どれでもいける。
画像を読み込んで、横幅960pxに変換(アスペクト比 維持)して、aerial_960.jpg として保存するコードを例に各ケースの書き方を示す。
非同期(コールバック)
1 | const sharp = require("sharp"); |
Promise
1 | const sharp = require("sharp"); |
async/await
1 | const sharp = require("sharp"); |
await/catch (おまけ)
async関数においてtry/catchではなくawait/catchパターンを活用する - Qiita を読んだので、try/catch ではなく await/catch で試しに書いてみた。
なるほど、確かにスッキリした感がある。
1 | const sharp = require("sharp"); |
ファイル出力
デフォルトパラメータでファイル出力する場合には toFile メソッドだけで良いが、細かいパラメータを調整したい場合には拡張子ごとのメソッドを利用する。
jpeg で品質を 60(デフォルトは 80)にして保存したい場合には以下の通り。
1 | sharp("input.jpg") |
リサイズ
resize を使う。
幅(width)のみ、高さ(height)のみが指定された場合は、アスペクト比を維持したまま変換となる。
幅(width)、高さ(height)両方が指定された場合は、変換方法を fit で指定することができる。
cover: アスペクト比維持、はみ出る部分はトリミングcontain: アスペクト比維持、はみ出ないように縮小し、余白部分は塗りつぶしfill: アスペクト比無視、指定サイズに引き延ばしinside: アスペクト比維持、小さい方に合わせて変換outside: アスペクト比維持、大きい方に合わせて変換
cover や contain を選択した場合、position でトリミング位置を指定することができる。
幅のみ指定
resize(<width>) とする。
1 | sharp("aerial_1920.jpg").resize(500); // 幅 500px に変換(高さは自動調整) |
もしくは、resize({width: <width>}) とする。
1 | sharp("aerial_1920.jpg").resize({width: 500}); // 幅 500px に変換(高さは自動調整) |

高さのみ指定
resize(<height>) とする。
1 | sharp("aerial_1920.jpg").resize(null, 300); // 高さ 300px に変換(幅は自動調整) |
もしくは、resize({height: <height>}) とする。
1 | sharp("aerial_1920.jpg").resize({height: 300}); // 高さ 300px に変換(幅は自動調整) |

幅、高さ指定(fit: cover)
幅、高さを指定して fit を省略した場合は cover となる。
cover: Crop to cover both provided dimensions (the default).
指定サイズに合うように、はみ出た部分はトリミングされる。
1 | sharp("aerial_1920.jpg").resize({width: 500, height: 200}); |

幅、高さ指定(fit: contain)
contain: Embed within both provided dimensions.
アスペクト比を維持して、指定サイズ内に埋め込む。余白部分は塗りつぶし。
1 | sharp("aerial_1920.jpg").resize({ |
幅、高さ指定(fit: fill)
fill: Ignore the aspect ratio of the input and stretch to both provided dimensions.
指定サイズに合わせて元画像を変換(アスペクト比を無視)する。
1 | sharp("aerial_1920.jpg").resize({ |

幅、高さ指定(fit: inside)
inside: Preserving aspect ratio, resize the image to be as large as possible while ensuring its dimensions are less than or equal to both those specified.
アスペクト比を維持して、「元画像の widthvs 指定 width」、「元画像の height vs 指定 height」の小さい方に合わせて変換。
1 | sharp("aerial_1920.jpg").resize({ |

幅、高さ指定(fit: outside)
outside: Preserving aspect ratio, resize the image to be as small as possible while ensuring its dimensions are greater than or equal to both those specified. Some of these values are based on the object-fit CSS property.
アスペクト比を維持して、「元画像の widthvs 指定 width」、「元画像の height vs 指定 height」の大きい方に合わせて変換。
1 | sharp("aerial_1920.jpg").resize({ |

幅、高さ指定(fit: cover/contain, position: xxx)
fit を cover, contain にした場合、position で、トリミング位置などを変更できる。
position には top, right top, right, right bottom, bottom, left bottom, left, left top が指定できる。
今回の画像だと position: "top", position: "right top", position: "left top" は同じ結果になるので、一部のみ記載する。
あと gravity というパラメータもあったけど、これはよくわからなかった。(試したけど全部同じ画像になった。)
fit: cover, position: top
1 | sharp("aerial_1920.jpg").resize({ |

fit: cover, position: bottom
1 | sharp("aerial_1920.jpg").resize({ |
背景色指定
fit: "contain" の塗りつぶし色を background で変更できる。
1 | sharp("aerial_1920.jpg").resize({ |

まとめ
npm install sharpのみで使える- ImageMagick より 4〜5倍ほど高速(らしい)
sharp("path").resize(width, height).toFile("path")でリサイズして出力と簡単
その他・メモ
リサイズ以外にも rotate や flip などのメソッドがあるので、ちょっとした変換には便利そう。
参考文献
- lovell/sharp
- Docs - home - sharp
- Node.jsのライブラリsharpでリサイズを試してみる | Simple is Beautiful.
- Node.js向け画像編集ライブラリSharp - kamoqq.info
- async関数においてtry/catchではなくawait/catchパターンを活用する - Qiita
関連記事
- docker-lambda + sharp で画像変換する AWS Lambda Function
- AWS lambda で S3 の画像をリサイズする(チュートリアル)
- axios で添付ファイルありのリクエスト(multipart/form-data の POST)
- Chart.js(vue-chartjs) でツールチップの表示内容を変更
- Vue.js で日本語変換での誤発火を抑止しつつ Enter キーで Submit
- ツールチップを簡単に表示できる Tippy.js の使い方
- JavaScript で URL のクエリパラメータを操作する方法
- jQuery Select2 で、初期値の設定と選択状態のクリア