Chrome 拡張機能で Firebase Authentication の認証
はじめに
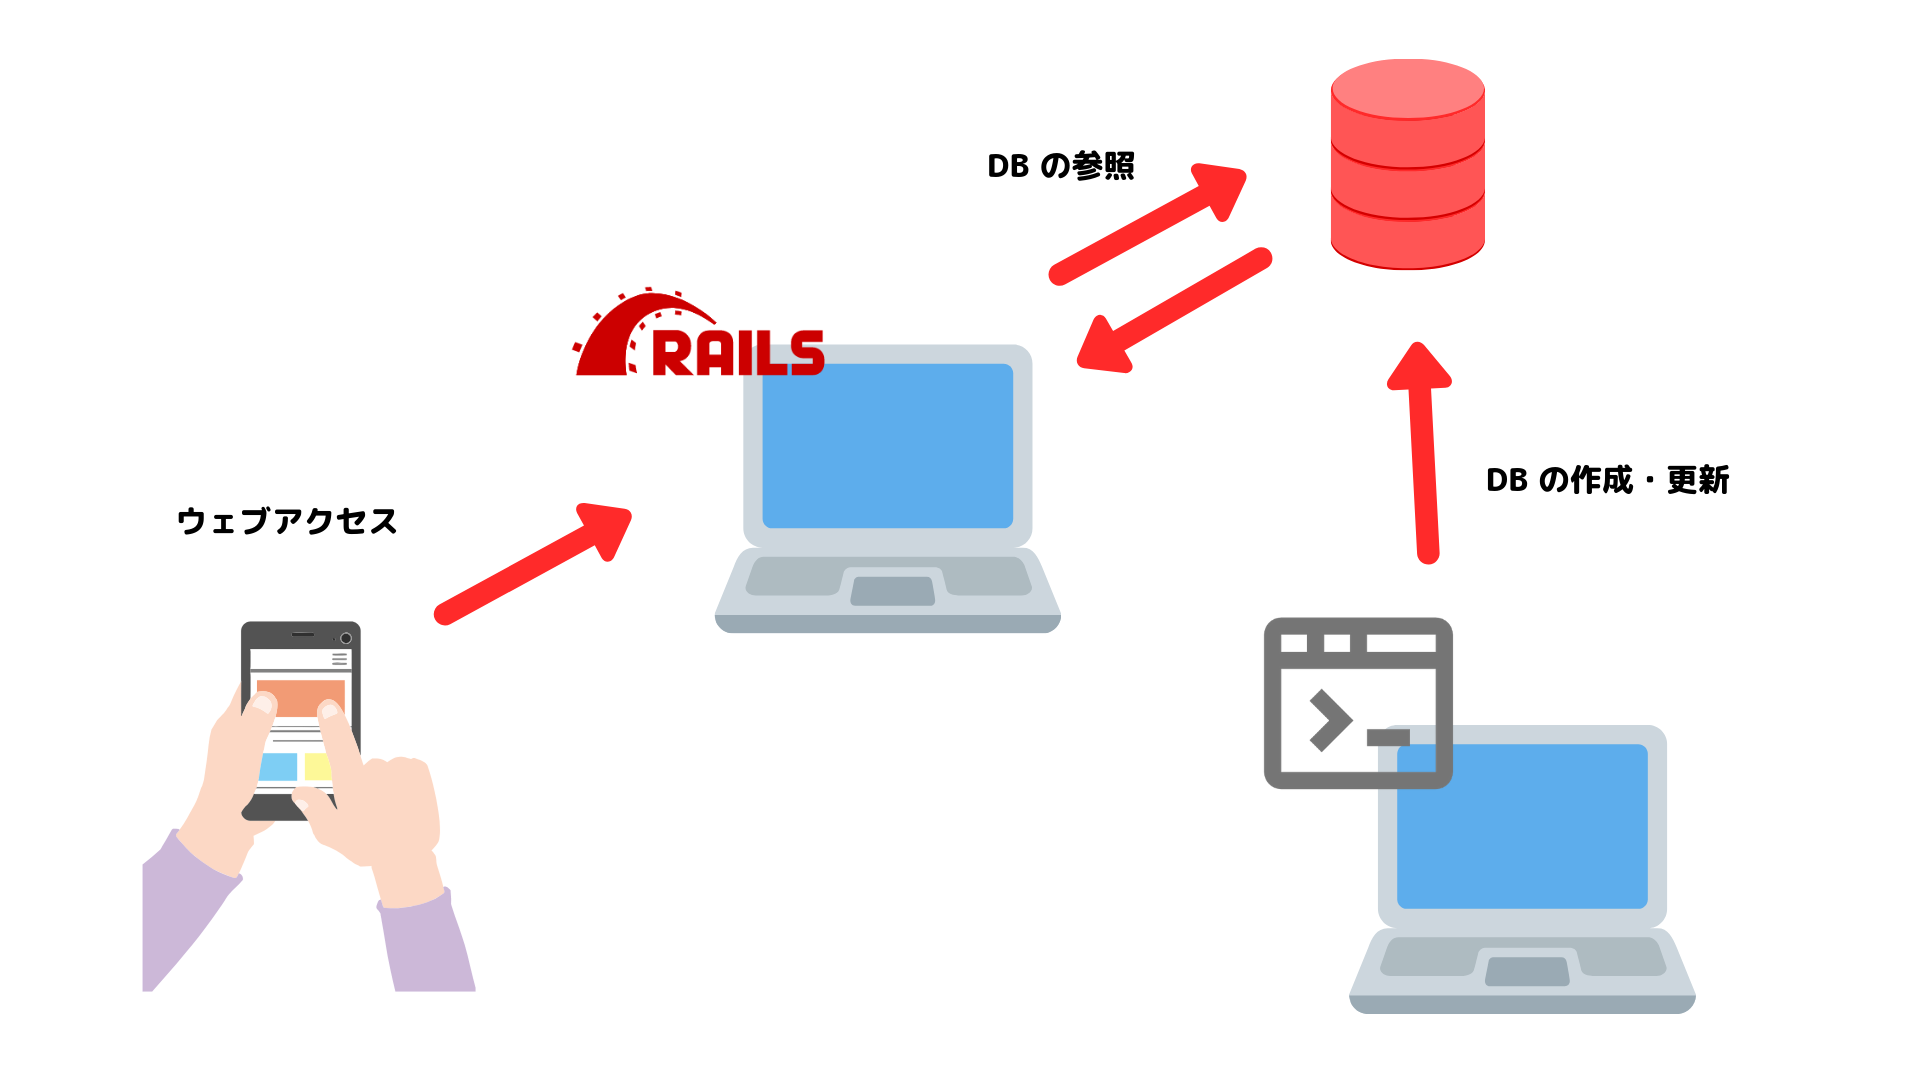
Chrome 拡張機能で Firebase Authentication を使って認証する方法。
TL;DR
- Email/Password での認証は
signInWithEmailAndPasswordで実施- 次回以降ログインできるように Email/Password を Sync ストレージ に保存(※セキュリティ上の問題あり)
- Email/Password で認証後、トークン発行&保持 でもいけそうだけど試せてない
- Google 認証などの方法もあるが試せてない
目次
環境・条件
1 | $ sw_vers |
詳細
拡張機能のベースは webpack & Babel を使って Chrome 拡張機能を開発するためのテンプレート(Hot Reload 付き) を使用。
あらかじめ Firebase Auth へのユーザー登録は済ませている前提。
Email/Password でログイン - 1
リポジトリ: 17number/chrome-extension-with-firebase-auth-email-password-example
動作イメージ
アイコンクリックで Email/Password の入力エリアを表示、ログインできたら Firebase UID を表示する。
次回以降ログインできる用(= 毎回入力しなくて良い用)に Email, Password を Sync ストレージに保存しておく。(※)
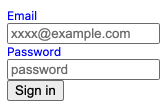
ログイン前
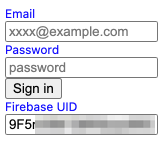
ログインできたら、Firebase UID を表示
ざっくり解説
options.html
1 |
|
options.js
1 | import './assets/stylesheets/options.scss'; |
- ポップアップ時に
initializeAppで Firebase SDK の初期化email,passwordが保存されていたらsignInWithEmailAndPasswordでログイン試行
- ログインできたら
email,passwordを Sync ストレージ に保存chrome.storage.syncの代わりに mozilla/webextension-polyfill のbrowser.storage.syncを使用
- ログイン後
uidを表示
問題点
実装はシンプルでわかりやすいが Email, Password を Storage に保存しておく必要がある(= セキュリティ的に良くない)ので注意。
最低限生データではなく暗号化して保存した方が良いと思われる。(本質的な解決にはならないし、暗号化/復号化 に使う secret も同梱するので微妙ではあるが。。。)
以下、brix/crypto-js を使う場合の一例。
1 | const CryptoJS = require('crypto-js'); |
Email/Password でログイン - 2
Storage に認証情報そのものではなくトークンを保存する方法。
以下あたりを参考にすればいけると思うが、試せてない(ので、できないかも)。試したら追記する。
Google 認証
試せてない。以下あたりが参考になると思う。試したら追記する。
- JavaScript で Google ログインを使用して認証する | Firebase
- Google Developers Japan: Chrome 拡張機能で Firebase を使う方法
- Firebase Auth w/ Google Sign-In in Chrome Extensions
- Chrome拡張とFirebaseで作るチャットアプリ
まとめ
- Email/Password での認証は
signInWithEmailAndPasswordで実施- 次回以降ログインできるように Email/Password を Sync ストレージ に保存(※セキュリティ上の問題あり)
- Email/Password で認証後、トークン発行&保持 でもいけそうだけど試せてない
- Google 認証などの方法もあるが試せてない
参考文献
- JavaScript でパスワード ベースのアカウントを使用して Firebase 認証を行う
- カスタム トークンを作成する | Firebase
- ID トークンを検証する | Firebase
- 認証状態の永続性 | Firebase
- Google Developers Japan: Chrome 拡張機能で Firebase を使う方法
- Firebase Auth w/ Google Sign-In in Chrome Extensions
- Chrome拡張とFirebaseで作るチャットアプリ
- brix/crypto-js
- mozilla/webextension-polyfill
関連記事
- Stripe & Firebase によるサブスクリプションのメモ
- Stripe & Firebase による支払い処理のチュートリアル
- Vue.js を使ってメインページ側で動作する Chrome 拡張機能を開発する方法
- webpack & Babel を使って Chrome 拡張機能を開発するためのテンプレート(Hot Reload 付き)
- axios で添付ファイルありのリクエスト(multipart/form-data の POST)
- axios で unable to verify the first certificate の対応方法
- JavaScript で URL のクエリパラメータを操作する方法
- jQuery Select2 で、初期値の設定と選択状態のクリア