NestJS のチュートリアル
はじめに
nestjs/nest のチュートリアルなどを触った際のメモ。
自分の中で知見がまとまったら内容ごとに別記事に分離するかも。
チュートリアル: Documentation | NestJS - A progressive Node.js framework
TL;DR
- 別途記載
目次
環境・条件
1 | $ sw_vers |
詳細
参考リポジトリ: 17number/nestjs-practice
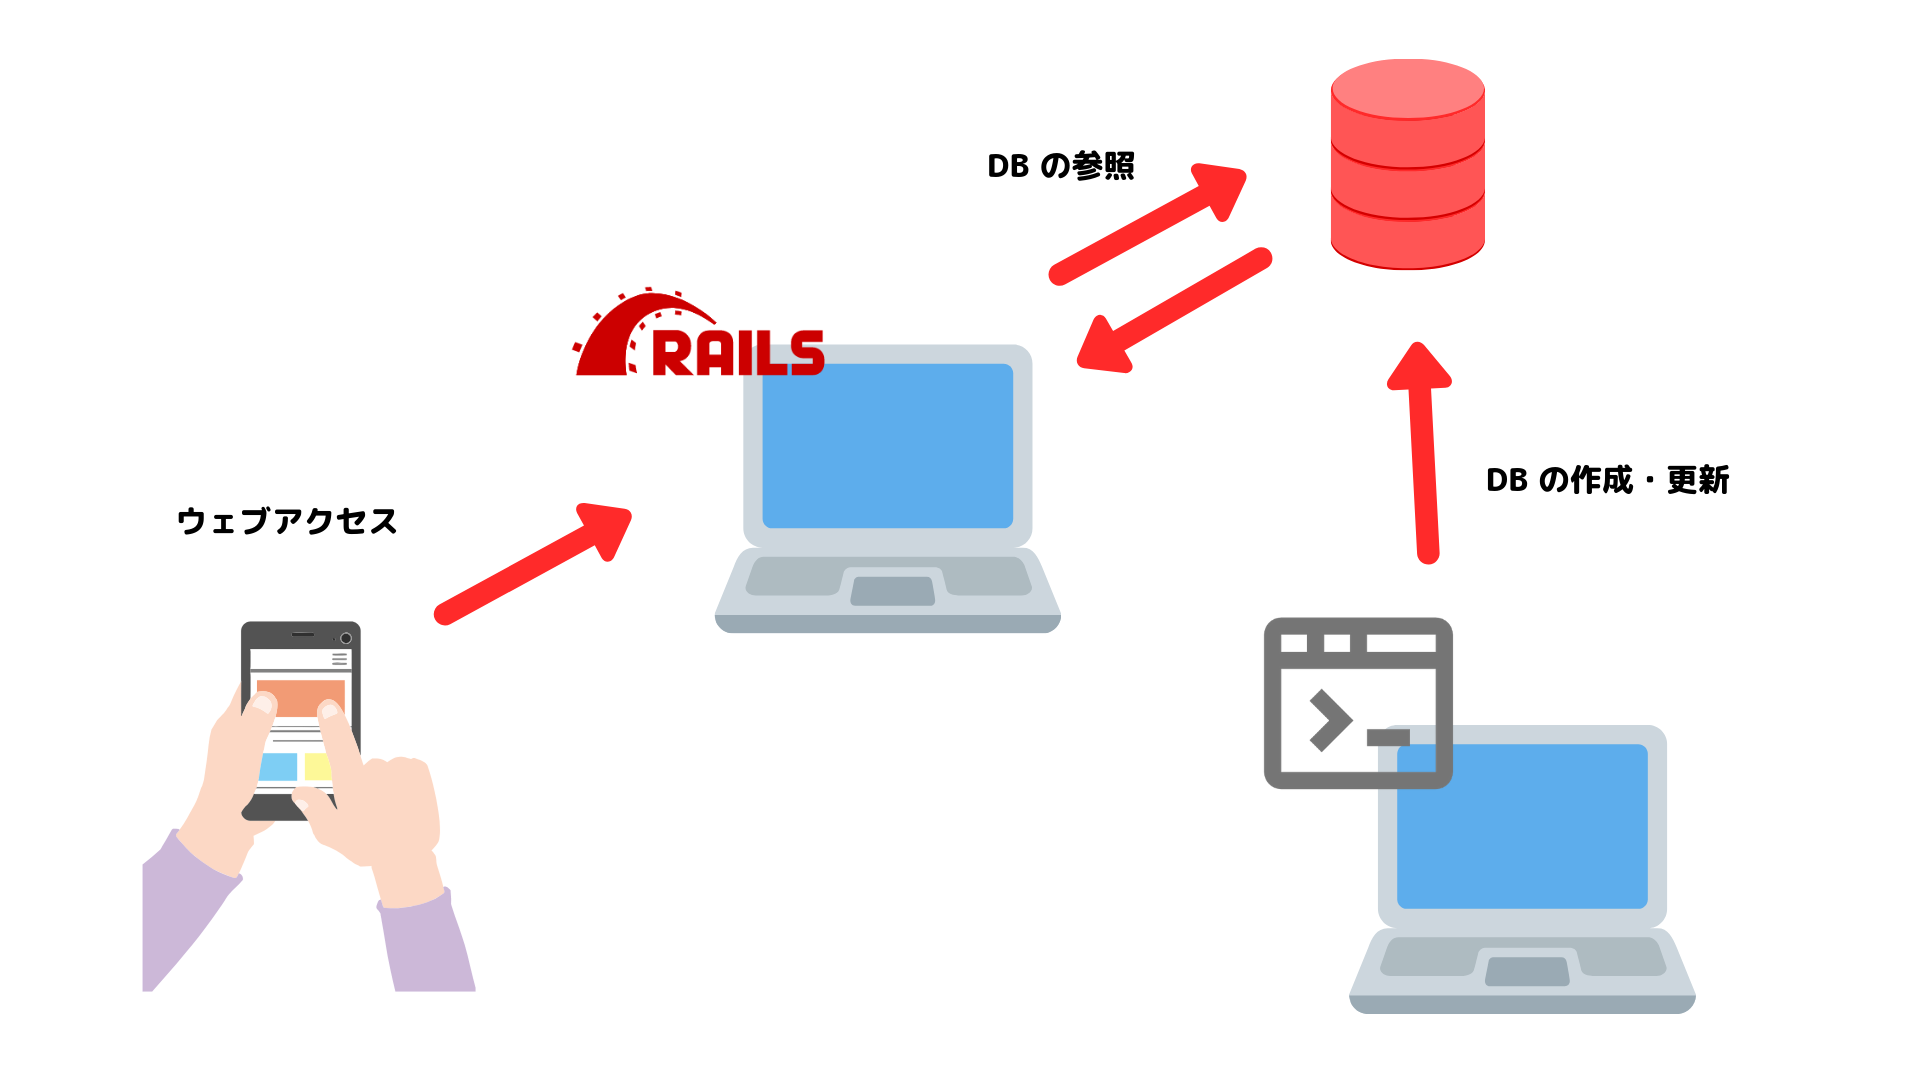
NestJS(Nest) とは
NestJSとは - NestJSのススメ ~Expressを超えてゆけ~ - Qiita がわかりやすい。以下、引用。
- Typescript製のバックエンドフレームワーク
- デフォルトではExpressをコアとして動作
- Fastifyをコアとして動作させることもできる
- Node.jsで上で動く
- 実装と疎結合になるようなアーキテクチャ
- nest cli で簡単にプロジェクトやソースファイルのテンプレートを生成できる
- Expressのミドルウェアをそのまま使える
- テストフレームワークが用意されている
- 認証ライブラリはPassportなどが使える
- GraphQLもサポート
- WebSocketももちろんOK
- class-validatorを使って楽々バリデーション
- TypeORMで型の恩恵を最大限に受けつつDB操作できる
- とにかく拡張性が高い
合わせて、公式ドキュメント から引用。
Introduction
Nest (NestJS) is a framework for building efficient, scalable Node.js server-side applications. It uses progressive JavaScript, is built with and fully supports TypeScript (yet still enables developers to code in pure JavaScript) and combines elements of OOP (Object Oriented Programming), FP (Functional Programming), and FRP (Functional Reactive Programming).
Under the hood, Nest makes use of robust HTTP Server frameworks like Express (the default) and optionally can be configured to use Fastify as well!
Nest provides a level of abstraction above these common Node.js frameworks (Express/Fastify), but also exposes their APIs directly to the developer. This allows developers the freedom to use the myriad of third-party modules which are available for the underlying platform.Philosophy
In recent years, thanks to Node.js, JavaScript has become the “lingua franca” of the web for both front and backend applications. This has given rise to awesome projects like Angular, React and Vue, which improve developer productivity and enable the creation of fast, testable, and extensible frontend applications. However, while plenty of superb libraries, helpers, and tools exist for Node (and server-side JavaScript), none of them effectively solve the main problem of - Architecture.
Nest provides an out-of-the-box application architecture which allows developers and teams to create highly testable, scalable, loosely coupled, and easily maintainable applications. The architecture is heavily inspired by Angular.
DeepL での翻訳。
序章
Nest (NestJS) は効率的でスケーラブルな Node.js サーバーサイドアプリケーションを構築するためのフレームワークです。プログレッシブJavaScriptを使用し、TypeScriptを使用して構築され、完全にサポートしています(それでも開発者は純粋なJavaScriptでコーディングすることができます)。
Nest は Express (デフォルト) のような堅牢な HTTP サーバフレームワークを利用しており、オプションで Fastify を使用するように設定することもできます。
Nestはこれらの一般的なNode.jsフレームワーク(Express/Fastify)よりも抽象化されたレベルを提供しますが、そのAPIを開発者に直接公開しています。これにより、開発者は基盤となるプラットフォームで利用可能な無数のサードパーティモジュールを自由に使用することができます。哲学
近年、Node.jsのおかげで、JavaScriptはフロントエンドとバックエンドの両方のアプリケーションのためのウェブの「共通言語」となりました。これにより、Angular、React、Vue のような素晴らしいプロジェクトが生まれ、開発者の生産性を向上させ、高速でテスト可能で拡張性のあるフロントエンドアプリケーションの作成を可能にしました。しかし、多くの優れたライブラリ、ヘルパー、ツールが Node (とサーバーサイド JavaScript) のために存在する一方で、それらのどれもが主な問題であるアーキテクチャを効果的に解決するものではありません。
Nest は、開発者やチームが高度にテスト可能で、スケーラブルで、疎結合で、保守が容易なアプリケーションを作成することを可能にする、すぐに使えるアプリケーションアーキテクチャを提供しています。このアーキテクチャはAngularに大きく影響を受けています。
インストール/HelloWorld など
参考: First steps | NestJS - A progressive Node.js framework
nest CLI をグローバルインストール。
1 | $ npm i -g @nestjs/cli |
プロジェクト作成。
1 | $ nest new nestjs-practice |
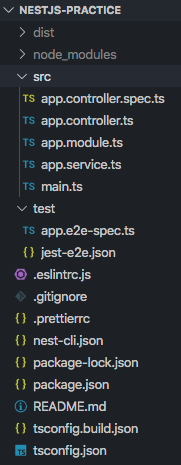
ディレクトリ構成はこんな感じ。
サーバの起動は npm run start
1 | $ npm run start |
http://localhost:3000/ にアクセスすると Hello World! が表示される。
start 以外にも start:dev, start:debug, start:prod などがある。
npm run start:dev や npm run start:debug を使うとファイル変更を検知して、自動的にサーバを再起動してくれる。
1 | $ npm run start:dev |
以下は package.json の scripts 抜粋。
1 | { |
HMR(Hot-Module Replacement) の設定
参考PR: HMR(Hot-Module Replacement) の設定 by 17number · Pull Request #1 · 17number/nestjs-practice
参考: Hot reload | NestJS - A progressive Node.js framework
npm run start:dev などで変更検知はしてくれるが、nodemon を使ったサーバ全体の再起動になっており重いらしい。
そこで Webpack を使った HMR(Hot module replacement)の設定を行う。
必要なパッケージのインストール。Installation の内容に @types/webpack-env を追加。
参考: NestJSでHot Module Replacementを使った開発環境構築 - Fusic Tech Blog
1 | $ npm i -D webpack-node-externals start-server-webpack-plugin @types/webpack-env |
webpack-hmr.config.js を作成。Configuration の内容そのまま。
1 | const webpack = require('webpack'); |
Hot-Module Replacement の記述に従い、src/main.ts と package.json を修正。
src/main.ts
1 | async function bootstrap() { |
package.json
1 | "start": "nest start", |
npm run start:dev での挙動が変わっているはず。(新規作成したばかりなので、現時点ではあまり恩恵は感じられない)
1 | $ npm run start:dev |
Fastify の利用
参考PR: Fastify の利用 by 17number · Pull Request #2 · 17number/nestjs-practice
参考: Performance (Fastify) | NestJS - A progressive Node.js framework
@nestjs/platform-fastify をインストール。
1 | $ npm i @nestjs/platform-fastify |
src/main.ts を修正、Adapter の内容そのまま。
1 | import { NestFactory } from '@nestjs/core'; |
lodalhost, 127.0.0.1 以外からの接続を受け付けるには app.listen() を修正。
1 | - await app.listen(3000); |
Fastify options の例のように FastifyAdapter にオプションを渡すこともできる
1 | new FastifyAdapter({ logger: true }); |
Fastify | MVC | NestJS - A progressive Node.js framework にも Fastify の設定方法が書かれている。
※微妙に↑と異なるが、ちゃんと見てない。
Controller/Routing
参考PR: Overview controllers by 17number · Pull Request #3 · 17number/nestjs-practice
参考: Routing | Controllers | NestJS - A progressive Node.js framework
nest generate controller
nest g co(= nest generate controller) で Controller 一式を追加。
1 | $ nest g --help |
nest g co cats を実行すると、以下のファイルが生成される。
1 | $ nest g co cats |
src/cats/cats.controller.ts
1 | import { Controller } from '@nestjs/common'; |
src/cats/cats.controller.spec.ts
1 | import { Test, TestingModule } from '@nestjs/testing'; |
src/app.module.ts
1 | import { AppService } from './app.service'; |
nest g コマンドは -d オプションで Dry Run できる。
1 | $ nest g -d co dogs |
path を指定すると、src/<path>/<name> でディレクトリが作成される。
1 | $ nest g -d co dogs my-dogs |
デコレータ
@Controller
@Controller() でベースとなる URL(URI) の指定。@Controller() だと / で、@Controller('cats') だと /cats となる。
1 | import { Controller } from '@nestjs/common'; |
@Get, @Post, @Put, @Patch, @Delete, @Options, @Head, @All
参考: Resources
メソッドの前に @Get(), @Post などを記述することで、HTTP Request とメソッドとを対応付けられる。
@Get@Post@Put@Patch@Delete@Options@Head@All
1 | import { Controller, Get, Post } from '@nestjs/common'; |
@Get('mine') のようにデコレータ内にパスを記述すると /cats/mine が URL となる。
1 | import { Controller, Get } from '@nestjs/common'; |
@Get('ab*cd') のようにワイルドカード(*, ?, +, ())も使用可能。
参考: Route wildcards
@Param
@Get(':id') のように :xx で動的なパラメータをパスに指定可能。
参考: Route parameters
id を利用するには @Param() params を引数として渡して params.id のようにするか、あるいは @Param('id') id のようにパラメータ名を @Param にわたすと良い。
@Param() params を渡すパターン。
1 | import { Controller, Get } from '@nestjs/common'; |
@Param('id') id を渡すパターン。
1 | import { Controller, Get } from '@nestjs/common'; |
@Request, @Response, @Res, @Next, @Session, @Param, @Body, @Query, @Headers, @Ip
参考: Request object
@Req() などを使うことでリクエスト(のオブジェクト)の内容を参照可能。
前章の @Param() も Request Object のひとつなので、@Req() req を使って req.params でもアクセス可能。
@Request(), @Req() |
req |
@Response(), @Res()* |
res |
@Next() |
next |
@Session() |
req.session |
@Param(key?: string) |
req.params / req.params[key] |
@Body(key?: string) |
req.body / req.body[key] |
@Query(key?: string) |
req.query / req.query[key] |
@Headers(name?: string) |
req.headers / req.headers[name] |
@Ip() |
req.ip |
@Req() を使う例。
1 | import { Controller, Get, Req } from '@nestjs/common'; |
request をログ出力するとこんな感じ。
1 | { |
なお、express を使う場合は @types/express が必要っぽい。
1 | $ npm i @types/express |
1 | import { Controller, Get, Req } from '@nestjs/common'; |
fastify の場合はたぶん FastifyRequest が適切そう。(引数の型未設定(= any) でも動く)
1 | import { Controller, Get, Req } from '@nestjs/common'; |
ちなみに、VSCode 使ってるなら簡単な確認は REST Client を使うのが楽。
- VS Code上でHTTPリクエストを送信し、VS Code上でレスポンスを確認できる「REST Client」拡張の紹介 - Qiita
- [VSCode] REST Client は変数を使うとAPIの環境やパラメータ変更が楽になる! | Developers.IO
- REST API のテストに Postman 使ってたけど Visual Studio Code の REST Client に乗り換えた - かずきのBlog@hatena
- 続:Postman 使ってたけど VSCode の REST Client に乗り換えた - かずきのBlog@hatena
@HttpCode
参考: Status code
HTTP Status code はデフォルトで 200(POST は 201)になっている。
@HttpCode() で変更可能。
1 | import { Controller, Get, Post, HttpCode } from '@nestjs/common'; |
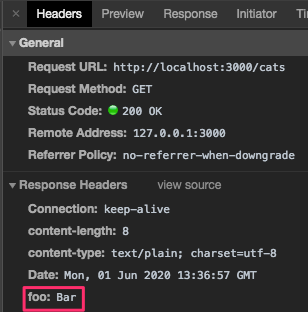
@Header
参考: Headers
@Header() で Response Header を設定できる。
1 | import { Controller, Get, Header } from '@nestjs/common'; |
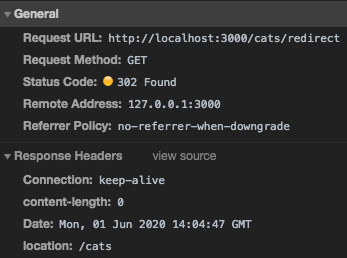
@Redirect
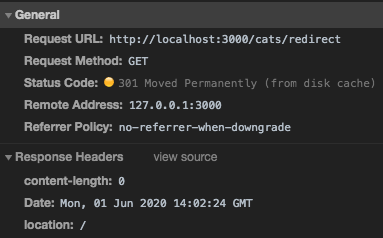
@Redirect() でリダイレクトできる。デフォルトの Status Code は 302 だが、@Redirect('path', 301) のように第2引数で設定も可能。
1 | import { Controller, Get, Redirect } from '@nestjs/common'; |
/cats/redirect にアクセスすると、redirect() メソッドの処理後(= console.log の動作後)に /cats にリダイレクトされる。
以下はリダイレクト先についてのメモ
@Redirect(''): NG:/cats/redirectでリダイレクトを繰り返す@Redirect('cats'): NG:/cats/catsにリダイレクト@Redirect('/'): NG(場合による):/にリダイレクト
条件次第でリダイレクト先や Status Code を動的に変更したい場合は { url: string, statusCode: number } の Object を返却すると上書き(オーバーライド)される。
1 | import { Controller, Get, Redirect } from '@nestjs/common'; |
/cats/redirect にアクセスすると、/cats ではなく / にリダイレクトされる。
async/await
参考: Asynchronicity
メソッドを async/await を使って定義可能、戻り値の型を Promise にする必要がある。
1 | import { Controller, Get } from '@nestjs/common'; |
RxJS Observable を使う書き方もできるらしい。
(RxJS 自体も詳しくないし、試したらエラーになったこともあり、こっちはよくわかってない
Request payloads
参考: Request payloads
POST などでのリソース作成時のパラメータや、GET のリソース取得時のクエリなどは DTO(Data Transfer Object) を使う(のが好ましい)。
Interface を使う方法と Class を使う方法とがあるが、Class を使う方法が推奨されている。
src/cats/dto/create-cat.dto.ts を作成。
1 | export class CreateCatDto { |
src/cats/cats.controller.ts で import して、@Body の型として指定。
1 | import { Controller, Post, Body } from '@nestjs/common'; |
同じように src/cats/dto/update-cat.dto.ts, src/cats/dto/list-all-entities.dto.ts を作成。(中身は要件次第、今回は適当)
src/cats/dto/update-cat.dto.ts
1 | export class UpdateCatDto { |
src/cats/dto/list-all-entities.dto.ts
1 | export class ListAllEntities { |
src/cats/cats.controller.ts
1 | import { Controller, Get, Post, Body, Put, Param, Query } from '@nestjs/common'; |
Provides
参考: Providers | NestJS - A progressive Node.js framework
ここまで(2020/06/03 01:30 現在)。※すでに長くなってるので記事わけようかな
まとめ
- 別途記載
その他・メモ
nest g まとめ
nest を実行するとヘルプが表示される。
1 | $ nest |
ヘルプの一番下に nest g で使用可能(生成可能)なスキーマが表示されている。
1 | generate|g [options] <schematic> [name] [path] Generate a Nest element. |
-d で Dry Run が可能。
1 | $ nest g -d co dogs |
参考文献の候補
ちゃんと見れてないやつ。
- 【NestJSアドベントカレンダー】NestJS & TyoeORMをWebackでつかう!!!【21日目】 - なぽろぐ
- 触って覚える NestJS のアーキテクチャの基本 - Qiita
- 始めかた | NestJSドキュメント和訳 - Qiita
- Nest(TypeScript)で遊んでみる 〜REST API(CRUD)編〜 | AreaB Blog
- Home · nestjsx/crud Wiki
参考文献
- First steps | NestJS - A progressive Node.js framework
- Hot reload | NestJS - A progressive Node.js framework
- Performance (Fastify) | NestJS - A progressive Node.js framework
- NestJSでHot Module Replacementを使った開発環境構築 - Fusic Tech Blog
- NestJSのススメ ~Expressを超えてゆけ~ - Qiita
関連記事
- axios で添付ファイルありのリクエスト(multipart/form-data の POST)
- axios で unable to verify the first certificate の対応方法
- ブラウザで Node.js の Buffer を使う(CDN)
- Stripe & Firebase によるサブスクリプションのメモ
- Stripe & Firebase による支払い処理のチュートリアル
- Vue.js を使ってメインページ側で動作する Chrome 拡張機能を開発する方法
- JavaScript で URL のクエリパラメータを操作する方法
- jQuery Select2 で、初期値の設定と選択状態のクリア